
Bloodline Champions shut down in December 2017. The servers went dark, Stunlock Studios moved on to Battlerite, and the most mechanically pure PVP game ever made became inaccessible overnight. The community sites followed — Bakko’s Grave, the official forums, most of the fan wikis. The detailed knowledge of what made BLC’s 27 bloodlines tick has been scattering across the internet ever since.
This guide is an attempt to fix that. What follows is a comprehensive reference for every bloodline, every core mechanic, and the competitive scene that made BLC matter. If you played BLC and want to remember what made it special, or if you never played and want to understand why the arena brawler community still talks about it — this is the document.
For the history of BLC’s design philosophy and why it died, see Bloodline Champions: The Game That Started Arena PVP. This guide focuses on the game itself — the systems, the characters, and the details.
How BLC Worked
Before diving into bloodlines, you need to understand the systems that made BLC unique. These weren’t just features — they were the design philosophy that separated BLC from everything else.
The Ability System
Key Concept: Every bloodline in BLC shared the same 9-slot ability layout — M1, M2, Space, Q, E, R, F, EX1, EX2. No exceptions. This universal structure meant learning one bloodline taught you the control scheme for all 27. Your M1 was always your primary attack. Your Space was always your escape. Your F was always your ultimate. The skill wasn’t in learning buttons — it was in mastering what each bloodline did with them.
Every bloodline had 9 abilities mapped to a fixed control scheme:
| Key | Slot | Role |
|---|---|---|
| M1 | Primary Attack | Low cooldown main damage. Ranged projectiles or melee strikes. Many dealt escalating damage on consecutive hits (e.g., 140/160/180). |
| M2 | Secondary | Healers: primary heal. DPS/Tanks: powerful secondary attack, often with a long cast time. |
| Space | Escape/Mobility | Dash, teleport, leap, or self-buff. Every bloodline’s primary survival tool. |
| Q | AoE / Utility | Ground-targeted AoE, crowd control, or zone denial. |
| E | Control / CC | Hard crowd control — fear, incapacitate, silence — or significant debuff. |
| R | Defensive / Support | Shields, counters (trances), reflects, or ally protection. |
| F | Ultimate | Required 100% energy. Powerful finisher — channeled beams, dashes, transformations. |
| EX1 | Enhanced Ability 1 | Upgraded version of a base ability. Cost 25% energy. Shared cooldown with base ability. |
| EX2 | Enhanced Ability 2 | Upgraded version of another base ability. Cost 25% energy. Shared cooldown with base ability. |
The critical design choice: every ability was a skillshot. No auto-targeting. No lock-on. You aimed every heal, every projectile, every dash manually. This applied to everyone — supports had to land their heals on moving allies while dodging enemy attacks.
A 0.30-second global cooldown linked all abilities. This enabled attack weaving — alternating between different abilities was often faster than repeating one, since the GCD could be shorter than an individual ability’s cooldown.
Energy and the EX Dilemma
Energy was the universal resource, built by landing abilities — dealing damage, healing allies, triggering effects. The strategic tension was constant: do you spend 25% energy on an EX ability now for an immediate power spike, or save for your 100% energy ultimate?
This was a genuine decision every match. EX abilities were powerful enough to swing a fight. Ultimates were powerful enough to end one. Knowing which to choose — and when — was one of the biggest skill differentiators in BLC.
Recovery Health
When a player was healed, they didn’t regain real health. They gained recovery health — displayed as a lighter color on the health bar. Recovery health functioned identically in combat, but was capped at 40% of maximum HP. A character at 10% health could never be healed above 50%.
This single mechanic prevented turtle-healing strategies and ensured burst damage had lasting consequences. If you chunked someone for 60% of their health, they were permanently weaker for that round. Only the center orb could restore real health.
The Center Orb
A power rune spawned periodically at the center of every arena map. The team that claimed it received health and energy — and critically, the orb’s health restoration was real health, not recovery health. This made orb control the most important objective in every round.
The orb forced engagement. A losing team couldn’t retreat and stall because surrendering the orb meant giving the winning team an even larger resource advantage. It created burst-or-save dilemmas — do you burn your cooldowns on the enemy, or save damage to secure the orb? And it rewarded map awareness — the orb spawned on a timer, and good players positioned for orb control before the orb appeared.
Trance (Counter) Abilities
Key Concept: If you only learn one thing about BLC, learn this: the trance (counter) system was the single mechanic that defined high-level play. Every decision in combat — when to attack, when to hold, when to switch targets — revolved around whether the enemy’s trance was available. Mastering trance-baiting separated beginners from veterans more than any other skill.
Most bloodlines had a trance ability — a brief defensive stance that negated the next incoming attack and triggered a counter-effect (stun, teleport, damage). If an enemy attacked into a trance, they were punished. If nobody attacked, the trance expired and the user was vulnerable.
This created BLC’s deepest mind-game layer. Attacking someone with trance ready was dangerous. But holding back gave them time to reposition or heal. The correct play was to bait the trance — fake an attack, cancel an animation, switch targets — and then punish the cooldown window. At high levels, trance-baiting became an art form and was the primary skill that separated beginners from veterans.
For more on how this concept applies across PVP games, see our cooldown trading guide.
Sudden Death Fog
When the round timer expired, a circular fog wall closed in from the edges toward the center. The fog dealt true damage that bypassed all healing, shields, and damage reduction. Players could use knockback abilities to push enemies into the fog — which was both hilarious and tactically devastating.
Shift-Casting and Advanced Mechanics
Shift-casting was essential for healers: holding Shift while casting a healing or AoE ability auto-targeted yourself. Without this, self-healing required the cursor to be on your own character, which was impractical during combat.
Fakecasting — starting a channeled ability and canceling it — was the primary way to bait out enemy trances and defensive cooldowns. The audio and visual cues of a cast beginning were enough to trigger panic responses from opponents, and exploiting that became a core part of high-level play.
Traits and Medallions
Traits were passive stat bonuses (Power, Vitality, Expertise, Speed, Focus, Swiftness) assigned through a progression tree that unlocked with account level. They were controversial — many competitive players felt they undermined BLC’s pure-skill identity by giving experienced accounts stat advantages.
Medallions granted an extra active or passive ability. Crimson medallions were offensive, Cobalt were defensive, Purple were passive bonuses. Each medallion had 4 gem sockets for additional stat customization. The medallion system added build diversity but also complexity that some felt was unnecessary.
Game Modes
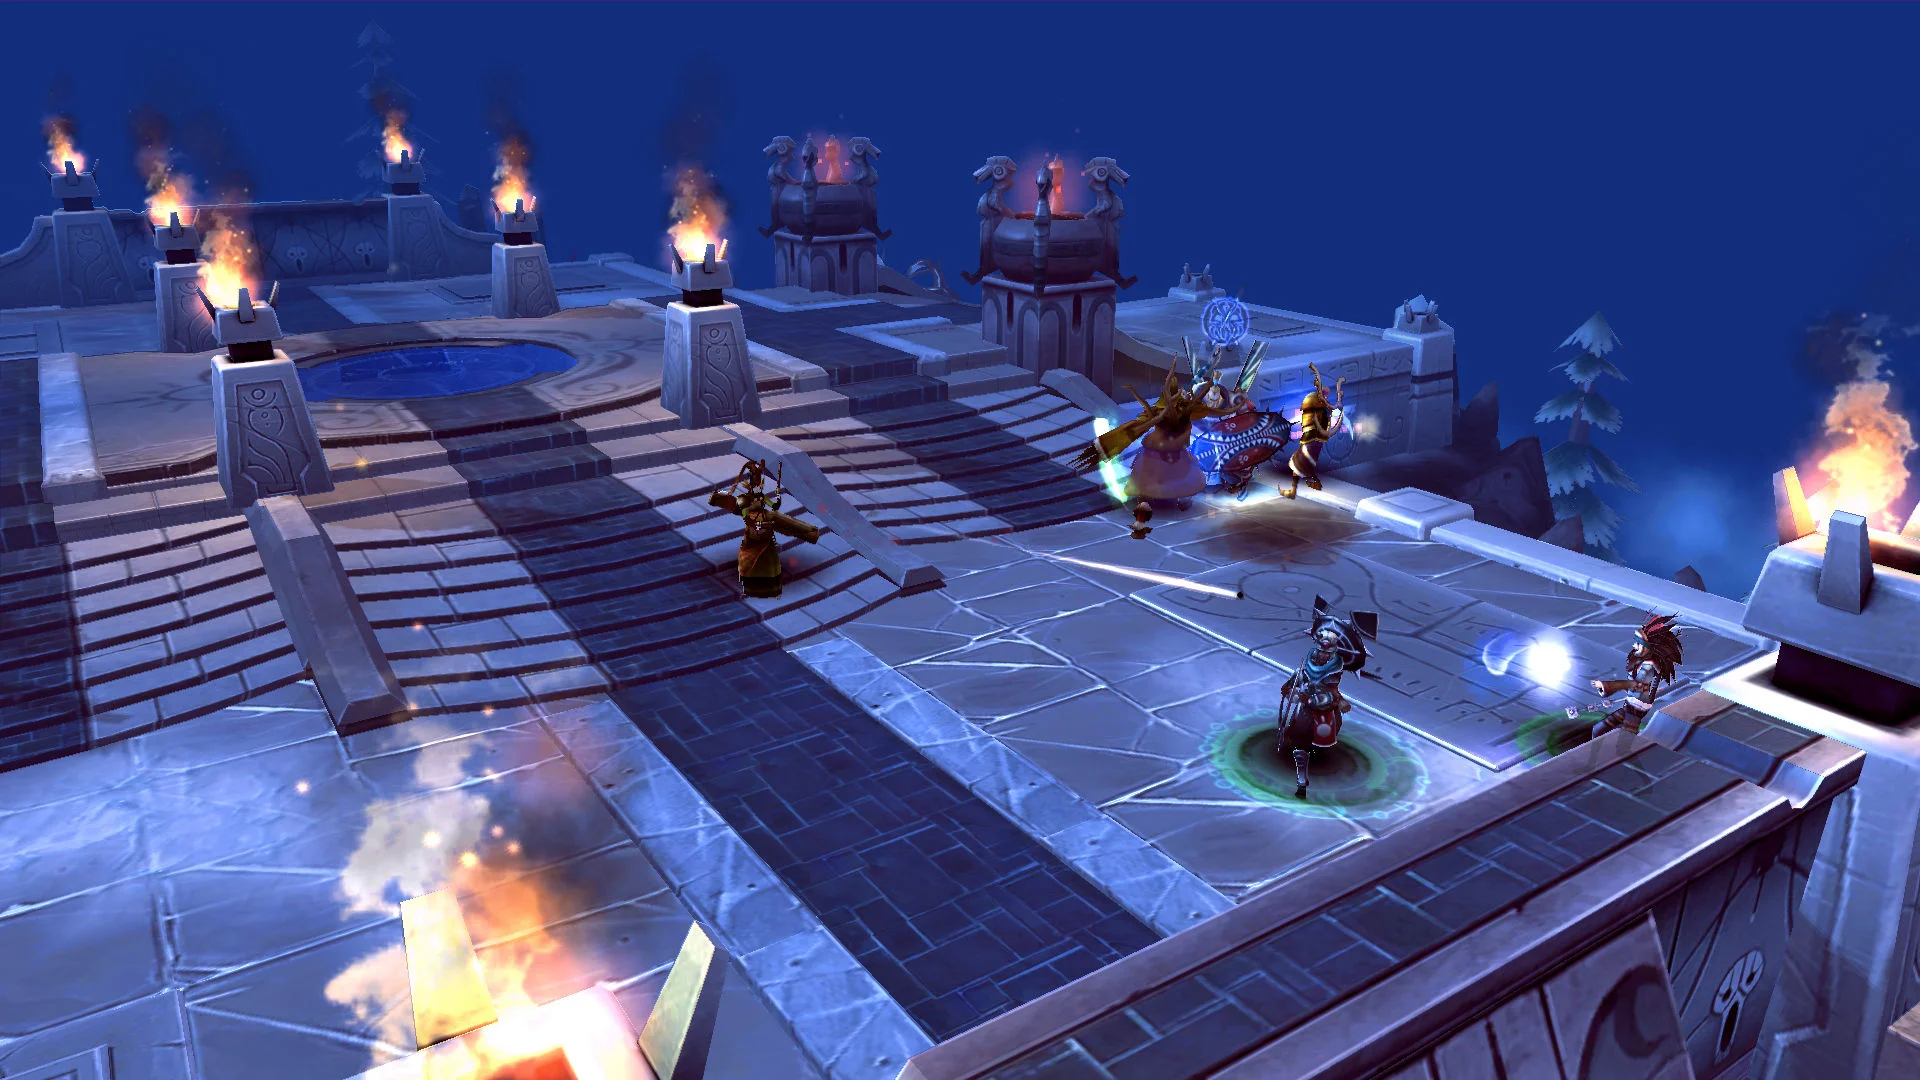
Arena was the competitive standard — last team standing, best-of-N rounds, in 2v2, 3v3, or 5v5. 3v3 was the primary tournament format.
Conquest featured base capture with progress bars, power rune buffs, and a more objective-focused flow. Capture the Artifact was a flag-capture variant where the artifact carrier gained damage but lost speed.
The Bloodlines: Tanks
Tanks were close-quarters fighters with high HP, strong crowd control, and defensive tools that protected their team. Seven bloodlines fell under this archetype. In BLC’s meta, a good tank didn’t just absorb damage — they created space, disrupted enemy positioning, and set up kills for their damage dealers.
 Vanguard
Identity: Holy warrior with sword and shield. The quintessential BLC tank.
Core mechanic: Rage stacks — built through Taunt (E) and Shield Slam EX, consumed by M1 for bonus damage and knockback.
| Ability | Key | Description |
|---|---|---|
 War Strike War Strike | M1 | 140/160/180 escalating damage. Consumes Rage stacks for +45 bonus damage + knockback. |
 War Axe War Axe | M2 | Projectile, 100-200 damage scaling with distance. Inflicts Slow + Dismantle (locks M1/M2). |
 Leap Attack Leap Attack | Space | Gap-closing AoE, 140 damage + 33% Slow for 2s. |
 Shield Slam Shield Slam | Q | Cone knockback, 80 damage + Demoralize (-50% damage/healing, diminishes per hit). |
 Taunt Taunt | E | Forces target movement for 2s. Grants 3 Rage stacks + Blood Fury (restores 40% damage taken as real HP on expiry). |
 Reflect Reflect | R | 1.2s invulnerability + 30% movespeed, reflects projectiles, stuns melee attackers 0.8s. |
 Heroic Charge Heroic Charge | F | Dash dealing 280-580 damage (scales with distance) + 280 AoE + 1.5s incapacitate. |
| EX Q | EX1 | Dash that drags first enemy hit, grants Rage stack. |
| EX R | EX2 | Team-wide heal + enemy slow. |
Playstyle: Aggressive peeler. The game plan was to maintain Rage stacks through Taunt and EX Shield Slam, then convert them into burst damage with empowered M1s. Reflect was one of the best defensive abilities in the game — invulnerability that also reflected projectiles and stunned melee attackers. Vanguard excelled at creating space for ranged teammates while threatening enough damage to punish anyone who ignored him.
In competitive: Vanguard was a meta staple in 3v3 compositions. The Taunt + Rage + M1 burst combo was reliable and the peeling toolkit was unmatched.
 Guardian
Identity: Holy great-axe warrior. The offensive tank.
Core mechanic: Judgment stacks — built passively every 2.5 seconds (max 4). At 4 stacks, M1 consumed all for a 180-degree cone attack dealing 200 damage + Slow.
| Ability | Key | Description |
|---|---|---|
 Sweeping Strike Sweeping Strike | M1 | 140/160/180 damage. Judgment cone at 4 stacks (200 damage + Slow). |
 Axe of Zechs Axe of Zechs | M2 | Boomerang projectile, 160 damage, hits outbound and return. 0.4s incapacitate (breaks on damage). |
 Intervene Intervene | Space | Dash, 80 damage + Armor Break on enemies. Heals ally 120 on contact. Cooldown resets on ally hit. Grants full Judgment stacks on ally hit. |
 Chains of Zechs Chains of Zechs | Q | Ground AoE (0.9s delay), 2.2s incapacitate + cooldown lock. |
 Counter Attack Counter Attack | E | Trance — negates next attack, leaps to cursor for 140 damage + 0.8s Silence. |
 Sanctuary Sanctuary | R | Shields ally for 60% damage reduction, absorbs 160 damage. Breaking triggers explosion + Weaken. |
 Cyclone Charge Cyclone Charge | F | Immaterial dash, 300 damage + Deep Wound (40 DPS + 30 per ability cast, 3s). |
| EX Space | EX1 | Leap with AoE Armor Break. |
| EX R | EX2 | Healing projectile bouncing to 3 allies + movespeed buff. |
Playstyle: Guardian was the most mobile tank thanks to Intervene’s cooldown reset mechanic — dashing to an ally reset the cooldown, meaning Guardian could chain Intervenes between multiple teammates to cross the arena in seconds. The Judgment cone gave M1 genuine threat, and Counter Attack (trance) added a punish tool that other tanks lacked.
In competitive: Guardian’s Intervene resets made him the premier peeling tank. The ability to instantly reposition between allies while dealing damage and healing on contact was unique in BLC.
 Thorn
Thorn
Identity: Plant-based burrowing tank with nature magic.
Core mechanic: Regrowth stacks (from M1, reduce damage taken by 3% per stack) and Entangling Roots (incapacitate from multiple abilities, breaks on damage).
| Ability | Key | Description |
|---|---|---|
 Root Bash Root Bash | M1 | 130/150/170 damage. Grants Regrowth on self (stacks 2x, -3% damage taken, 6s). |
 Fungal Spores Fungal Spores | M2 | 2 projectiles, 120 damage each. Debuffs: -10% movespeed, -15% damage/healing (stacks 3x). +50 bonus damage on debuffed targets. Heals Thorn 70 HP with Regrowth. |
 Mud Walk Mud Walk | Space | Burrow teleport, 120 damage + 0.5s Entangling Roots. Invulnerable underground. |
 Defiled Plant Defiled Plant | Q | Explodes after 0.7s, pulls enemies toward Thorn, 120 damage + 30% slow. |
 Mushroom Spore Mushroom Spore | E | Projectile, 80 damage + Entangling Roots (50 DPS, heals Thorn). |
 Treacherous Roots Treacherous Roots | R | Shield on self/ally, removes movement debuffs, 50% damage → healing. Attackers receive spreading Entangling Roots. |
 Dead Roots Dead Roots | F | Burrow to target creating root trail (3.5s), 80 damage per 0.5s + 40% slow. Destroys projectiles. |
| EX Q | EX1 | Creates healing plant for nearby allies. |
| EX E | EX2 | Higher damage + unbreakable Weaken debuff. |
Playstyle: The highest-HP character in the game. Thorn’s massive health pool and multiple escape tools (Mud Walk invulnerability, Treacherous Roots shield) made him the most forgiving tank for beginners. The root-and-pull gameplay disrupted enemy positioning constantly — Defiled Plant into Mushroom Spore was a reliable combo that controlled where enemies could stand.
 Glutton
Identity: Earth magic brawler. The self-sufficient tank.
Core mechanic: Armor Break stacks (from M1, increase damage taken by 6% per stack, max 3) and self-healing through Meat and Eat (Q).
| Ability | Key | Description |
|---|---|---|
 Crushing Strike Crushing Strike | M1 | 110/120/130 damage + Armor Break (6% increased damage taken, stacks 3x). |
 Stalagmite Stalagmite | M2 | 160 damage, knocks target airborne toward Glutton + 25% Slow. |
 Rush Rush | Space | Dash, 80-180 damage scaling with distance + 25% movespeed for 3s. |
 Meat and Eat Meat and Eat | Q | Cone melee, 100 damage + 1.8s incapacitate + self-heal 180 HP. |
 Earth Storm Earth Storm | E | Ground AoE, slows enemy projectiles, minor damage, grants teammates 25% damage reduction. |
 Stone Shield Stone Shield | R | Shield on self/ally, 80% damage reduction. 90 AoE damage at start and end. Breaks after 400 damage or 1.6s. |
 Aftershock Aftershock | F | 4 ground slams over 2.2s, each creating shockwave dealing 160 damage + Slow. |
| EX Q | EX1 | Projectile Meat and Eat with higher damage and extended incapacitate. |
| EX E | EX2 | Earth Storm that also heals teammates. |
Playstyle: The most straightforward tank in BLC. Glutton’s game plan was simple: get in melee range, stack Armor Break with M1, self-heal with Meat and Eat, and outlast the enemy. He lacked the team utility of Vanguard or Guardian but compensated with raw self-sufficiency. Stalagmite (M2) pulling enemies toward Glutton was the setup tool — land it, walk up, apply Armor Break, force their escape.
Battlerite equivalent: Rook inherited Glutton’s earth tank brawler identity.
 Inhibitor
Identity: Rune-powered spellcatcher. The burst DPS tank.
Core mechanic: Sol/Ohm stack interaction. Sol (from M1) increased damage taken. Ohm (from M2) reduced damage/healing. Consuming opposite stacks with attacks triggered bonus effects — Sol consumed by M2 dealt extra damage, Ohm consumed by M1 healed.
| Ability | Key | Description |
|---|---|---|
 Sol Bolt Sol Bolt | M1 | Projectile, 120 damage + Sol debuff (8% damage taken increase, stacks 3x). Consumes Ohm stacks, heals 65 HP per stack. |
 Ohm Bolt Ohm Bolt | M2 | Projectile, 70 damage + self-heal 70 + Ohm debuff (8% reduced damage/healing, stacks 3x). Consumes Sol stacks, 55 damage per stack. |
 Waji Waji | Space | Teleport, 100 damage + 0.8s incapacitate on enemies passed through. |
 Runic Discharge Runic Discharge | Q | Projectile exploding on contact: 120 direct + 80 AoE + Slow + Spell Block. |
 Wuju Wuju | E | Trance — negates next attack, removes debuffs, teleports behind attacker, 100 damage + 0.8s incapacitate. |
 Rune Shield Rune Shield | R | Shield, 50% damage reduction, absorbs 180 damage. Shield break: 120 AoE + 1.2s incapacitate. |
 Rune Infusion Rune Infusion | F | Channels 5 projectiles over 2.5s, 180 damage each + self-heal 90 + Sol/Ohm stacks. |
| EX Space | EX1 | Double teleport with bonus damage. |
| EX Q | EX2 | Summoned beam that charges while Inhibitor moves, then explodes. |
Playstyle: Inhibitor played more like a ranged DPS than a traditional tank, despite the classification. The Sol/Ohm stack system rewarded alternating between M1 and M2 — building Sol on the enemy to amplify your team’s damage, then consuming it with Ohm Bolt for burst. Wuju (trance) was one of the best counter abilities in the game, teleporting you behind the attacker for a guaranteed punish.
 Metal Warden
Identity: Magnetic force controller with arm cannon. The ranged tank.
Core mechanic: Molten Metal debuff (from Q) consumed by M1 for bonus damage + knockback. Zone control through ranged poke and crowd control.
| Ability | Key | Description |
|---|---|---|
 Metal Blast Metal Blast | M1 | Projectile, 130 damage. Consumes Molten Metal for +70 bonus damage + knockback. |
 Charged Bolt Charged Bolt | M2 | Channeled, 100-360 damage scaling with charge time + 1.5-3s Spell Block. |
 Magnetic Orb Magnetic Orb | Space | Transforms into a ball, removes movement debuffs, doubles movespeed, 120 damage + knockback on collision. |
 Molten Burst Molten Burst | Q | Cone attack, 120 damage + Molten Metal (-33% damage/healing, -20% movespeed). |
 Energy Leash Energy Leash | E | AoE leash — enemies leaving range take 120 damage + incapacitate. Inflicts -40% projectile speed. |
 Iron Claw Iron Claw | R | Shield, 80% damage reduction, returns projectiles. Breaks at 400 damage or 2s. |
 Overcharge Overcharge | F | Projectile creating gravitational singularity — direct hit 200, splash 100, pulling vortex at 50 DPS, explosion for 160. |
| EX Q | EX1 | Leap to target with knockback + Gradual Slow. |
| EX E | EX2 | Channels healing beam on closest ally. |
Playstyle: Metal Warden was functionally a support-tank hybrid. Charged Bolt (M2) was devastating against healers — a fully charged Spell Block lasting 3 seconds meant the enemy healer couldn’t cast for an eternity in BLC terms. Energy Leash zoned melee characters out of your team. The Overcharge ultimate was one of the most visually spectacular and mechanically interesting abilities in the game — a pulling vortex that exploded.
 Sentinel
Identity: Hammer-wielding earth tank with hookshot mobility.
Core mechanic: Stone Grapple cooldown resets (hitting allies or walls reset the cooldown, once per 3 seconds) enabling exceptional map traversal. Molten Shackles from charged M2 silenced enemies.
| Ability | Key | Description |
|---|---|---|
 Hammer Slam Hammer Slam | M1 | 130/150/170 damage + Enfeeble (-6% healing received, stacks 3x). |
 Stone Grapple Stone Grapple | M2 | Hookshot, 140 damage + 33% Slow + 0.5s stun. Pulls Sentinel to target. CD resets on ally/wall hit (3s lockout). |
 Crumble Crumble | Space | Teleport (0.9s delay), 100 damage + Slow. Recast: knocks enemies airborne for 1.9s. |
 Molten Surge Molten Surge | Q | Charged projectile, 100-240 damage + Molten Shackles (silence + movespeed/damage reduction). |
 Fissure Fissure | E | Erupting earth line (0.6s delay), 120 damage + Earth Shiver (-40% damage, -15% movespeed). |
 Spirit Ward Spirit Ward | R | Trance — negates next attack, grants 40% damage reduction, fires taunt projectile. Next M1: +140 bonus damage + 1s incapacitate. |
 Overdrive Overdrive | F | Dash, 210 damage + knockback. Multiple free re-casts over 5s. |
| EX Q | EX1 | AoE spin knocking all nearby enemies away. |
| EX E | EX2 | Healing projectile benefiting nearby allies. |
Playstyle: Sentinel’s hookshot reset mechanic was the most mobile tank tool in BLC. Grappling to a wall or ally reset the cooldown, meaning Sentinel could traverse the entire arena in seconds by chaining hookshot → wall → hookshot → ally → hookshot. The trade-off was the weakest raw survivability among tanks. Sentinel lived and died by positioning and hookshot execution.

The Bloodlines: Melee Damage
Melee damage dealers hit hard but had to get close. They had slightly higher HP than ranged bloodlines, limited ranged options, but devastating burst and strong mobility tools. In BLC’s meta, melee characters were assassins and disruptors — their job was to dive backlines and force the enemy team to peel.
 Stalker
Identity: Shadow assassin. Stealth and burst specialist.
Core mechanic: Shadow buffs — Shadow Strike (M2) debuffed the enemy and buffed Stalker’s movespeed/damage. Deviate (Space) granted Shadow Blades (+20% damage). Constant weaving between visibility and stealth.
| Ability | Key | Description |
|---|---|---|
 Quick Strike Quick Strike | M1 | 130/150/170 damage. Lunges forward with each attack (unique positional M1). |
 Shadow Strike Shadow Strike | M2 | 120 damage + debuff (15% slow, +20% damage taken from Stalker) + Dark Chase (+20% movespeed). |
 Deviate Deviate | Space | Instant teleport + Shadow Blades (+20% damage, 5s). |
 Puncturing Strike Puncturing Strike | Q | Double dash through enemies (immaterial). First: 20% slow. Second: 140 damage + 0.6s incapacitate. |
 Black Dagger Black Dagger | E | Removes enemy from combat for 2s (invisible, invulnerable, unable to act). On expiry: 160 AoE + slow to nearby enemy allies. |
 Stalker’s Cloak Stalker’s Cloak | R | Cleanses target ally + 33% damage reduction. Each removed debuff heals 140 HP. |
 Shadow Hunt Shadow Hunt | F | Teleport + 8s buff: next M1 deals +80 bonus damage + resets Deviate CD. -33% debuff duration. |
| EX Q | EX1 | Triple dash for extra repositioning. |
| EX R | EX2 | Cloak + invisibility + 20% movespeed. |
Playstyle: The premier hit-and-run assassin. Stalker’s game plan was to Deviate in (teleport + damage buff), burst with Shadow Strike → M1 combo, then escape with Puncturing Strike. Shadow Hunt (ultimate) was terrifying — an 8-second window where every M1 hit bonus damage and reset your escape. Good Stalkers switched targets constantly to maximize Shadow Hunt value.
Black Dagger was one of BLC’s most unique abilities — removing an enemy from the fight for 2 seconds. Used correctly, it turned 3v3 into 3v2. Used on the wrong target, it gave the enemy free time to recover.
Battlerite equivalent: Croak inherited some of Stalker’s stealth assassin DNA.
 Spear Master
Identity: Agile spear warrior. In-and-out burst fighter.
Core mechanic: Kunju (R) — a trance that teleported behind the attacker for massive damage. Exceptional escape tools that dismantled ranged bloodlines.
| Ability | Key | Description |
|---|---|---|
 Spear Slash Spear Slash | M1 | 140/160/180 damage. Primary damage source (~50% of total output). |
 Harpoon Harpoon | M2 | 140 damage + 1s immobilize, pulls Spear Master to target. |
 Fleetfoot Fleetfoot | Space | Invulnerability + immateriality (1.3s) + 35% movespeed, but -50% damage. Removes movement debuffs. |
 Whirling Blade Whirling Blade | Q | 120 damage, 180-degree arc, 1.6s incapacitate (breaks on damage). Interrupts channels. |
 Shuriken Throw Shuriken Throw | E | Bouncing projectile, 180/120/60 damage (3 bounces) + 25% slow. |
 Kunju Kunju | R | Trance — negates next attack, teleports behind attacker, 180 damage + 33% slow. |
 Whirlwind Whirlwind | F | 3s spin — immune to movement debuffs, +20% movespeed, 300 DPS. Continues through incapacitate. |
| EX M2 | EX1 | Pulls enemy to Spear Master instead of pulling Spear Master to enemy. |
| EX Space | EX2 | Dash through enemies dealing damage + locking cooldowns. |
Playstyle: The hardest counter to ranged bloodlines. Harpoon closed the gap, M1 delivered devastating damage, and if the enemy tried to fight back, Kunju punished them. Fleetfoot was the get-out-of-jail card — invulnerability with a movespeed buff to disengage. The skill expression came from knowing when to commit (Harpoon in) versus when to bait (force their escape, then Harpoon). Spear Master was one of the highest-skill-ceiling melee bloodlines.
 Reaver
Identity: Drunken swordmaster. Sustained brawler with utility.
Core mechanic: Drunken Haze (Q) debuffed enemies and breaking it with M1 healed the Reaver. Parry (R) reflected projectiles and countered attacks.
| Ability | Key | Description |
|---|---|---|
 Blade Strike Blade Strike | M1 | 150/170/190 damage. Heals 120 HP when breaking Drunken Haze. |
 Grappling Chain Grappling Chain | M2 | Projectile, 80-160 damage scaling with distance. Pulls both Reaver and target together. Locks cooldowns 0.5-1.5s. |
 Dragoon Strike Dragoon Strike | Space | Leap, 140 damage + mini-stun. Heals when breaking Drunken Haze. |
 Drunken Haze Drunken Haze | Q | Projectile potion, 150 direct/80 splash. Debuff: -20% movespeed, -33% damage/healing. |
 Roundhouse Kick Roundhouse Kick | E | Two-part dash, 60 damage each + 1.8s incapacitate. Same target twice = broken incap + 40 bonus damage. |
 Parry Parry | R | 1.2s — absorbs all attacks, reflects projectiles (100 damage + 0.7s incapacitate). |
 Drunken Brawler Drunken Brawler | F | 2s berserk — +33% movespeed, -50% debuff duration, 4 cleave attacks at 200 damage each + knockback. |
| EX E | EX1 | Single dash with Spellblock. |
| EX R | EX2 | 100% life leech + 50% damage reduction + movespeed. |
Playstyle: Reaver was the 1v1 king. The Drunken Haze → M1 healing loop meant he could sustain through incredible amounts of punishment. Parry reflected projectiles, which terrified ranged bloodlines. Grappling Chain was the catch tool — pulling both Reaver and the target together meant nobody escaped if the chain landed. In team fights, Reaver excelled at isolating one target and grinding them down.
 Ravener
Identity: Dual-mace berserker. Anti-ranged sustained DPS.
Core mechanic: Electrify (from Space) consumed by M1 for +50 bonus damage and 0.3s stun. Spinning Strike reflected projectiles.
| Ability | Key | Description |
|---|---|---|
 Spike Strike Spike Strike | M1 | 125/135/145 damage. Consumes Electrify for +50 bonus damage + 0.3s stun. |
 Thunder Strike Thunder Strike | M2 | Projectile, 160 damage + 1-2s incapacitate (scales with distance). |
 Assail Assail | Space | Jump applying Swiftness (+25% movespeed) to self and Electrify (10% slow) to enemies. |
 Spinning Strike Spinning Strike | Q | Spin reflecting projectiles, 30 damage per 0.25s, +25% movespeed. |
 Crude Strike Crude Strike | E | Dash punting enemies airborne. Knockback scales with distance. |
 Spike Shield Spike Shield | R | Shield on self/ally, 40% damage reduction. 60 AoE damage per hit (breaks after 4). |
 Earth Crush Earth Crush | F | Double jump, 260 AoE damage + 50% Electrify slow. |
| EX Space | EX1 | Next M1 after Swiftness applies Wasted debuff. |
| EX Q | EX2 | Immaterial spin with increased damage, no reflection. |
Playstyle: Ravener was pure sustained aggression. The game plan: Assail in (jump + Electrify enemies + Swiftness on self), M1 spam consuming Electrify for bonus damage and stuns, Spinning Strike to reflect ranged attacks while dealing damage. Ravener punished anyone who wasted their escape cooldown — once you were in range without an out, the M1 machine didn’t stop.
 Ranid Assassin
Identity: Frog-themed stealth poisoner. Hit-and-run specialist.
Core mechanic: Vicious Poison (from Blowdarts M2) stacking DOT that could be detonated by Toxin Bomb (E) for massive burst. Stealth M1 combo with stun.
| Ability | Key | Description |
|---|---|---|
 Blade Flurry Blade Flurry | M1 | Three strikes at 110/100/80 damage. From stealth: third hit stuns for 1.2s. |
 Blowdarts Blowdarts | M2 | 4 projectiles applying Vicious Poison (40 damage + 40 leech per 1.5s, -10% movespeed/stack, max 3). |
 Frog Leap Frog Leap | Space | Double jump, 200 damage per landing. |
 Camouflage Camouflage | Q | Invisibility + 15% movespeed (2.4s). M1 from stealth triggers bonus stun. |
 Toxin Bomb Toxin Bomb | E | 80 damage + slow. Consumes Vicious Poison for 130-190% of remaining poison damage. |
 Lunge Lunge | R | Dash, 100-180 damage scaling with distance + 1-2.5s Blind. |
 Venom Lunge Venom Lunge | F | Immaterial dash applying Venom (60 DPS, 4s). Venom explodes on expiry for 250 damage + AoE. |
| EX M2 | EX1 | Single piercing dart hitting all enemies at impact. |
| EX R | EX2 | Piercing dash blinding all enemies. |
Playstyle: The most forgiving melee bloodline and the best entry point for new players. Multiple escape tools (Frog Leap double jump, Camouflage stealth, Lunge dash) meant Ranid almost always had a way out. The core combo was Blowdarts (stack poison) → Camouflage → M1 from stealth (stun) → Toxin Bomb (detonate poison). Simple, effective, and satisfying.
Battlerite equivalent: Croak is the direct descendant — same frog, same stealth, same in-and-out design.
 Harbinger
Identity: Dark melee lifesteal mage. The hybrid.
Core mechanic: Hemorrhage debuff — applied by multiple abilities. M1 healed for 35% of damage dealt while Hemorrhage was active on the target. Self-sustaining through aggression.
| Ability | Key | Description |
|---|---|---|
 Shadow Slash Shadow Slash | M1 | 150/170/190 damage. Heals 35% of damage dealt if target has Hemorrhage. |
 Blood Grip Blood Grip | M2 | Projectile, 100 damage + 100 leech. Pulls target to Harbinger. Inflicts Silence + Hemorrhage. |
 Shadow Shift Shadow Shift | Space | Teleport + Hemorrhage AoE at destination. |
 Affliction Affliction | Q | 80 damage + 80 leech. After 1s: Plague spreads to nearby enemies. |
 Shadow Bolt Shadow Bolt | E | 280-360 damage scaling with distance + Amplify debuff. |
 Nether Shift Nether Shift | R | Ally becomes invulnerable/immaterial + 40% movespeed (1.8s). Moving through enemies: 80 damage + Hemorrhage + 80 self-heal. |
 Dark Ward Dark Ward | F | Self-buff: -20% damage taken, -33% debuff duration. Enhances M1, Shadow Bolt, and Affliction. |
| EX Q | EX1 | Silence instead of Plague. |
| EX E | EX2 | Instant cast, lower damage, stronger Amplify + faster projectile. |
Playstyle: Harbinger was the true hybrid — melee damage dealer with ranged abilities and team support. Blood Grip pulling enemies in was the initiation tool. Once Hemorrhage was applied, M1 became a lifesteal machine. Nether Shift on an ally was one of the most powerful protective abilities in BLC — full invulnerability plus movespeed. Harbinger demanded good decision-making about when to play aggressive (M1 lifesteal) versus supportive (Nether Shift, Affliction).
 Headhunter
Identity: Dual-scythe melee. The cooldown-reset specialist.
Core mechanic: Open Wound — applied by third M1, M2, E, R, and F. Harvest Blood (Q) cooldown reset when consuming Open Wound, enabling infinite sustain loops.
| Ability | Key | Description |
|---|---|---|
 Menacing Slash Menacing Slash | M1 | 110/120/130 damage. Third hit applies Open Wound. |
 Twin Death Twin Death | M2 | Two arcing scythe projectiles, 120 damage each + Gradual Slow + Open Wound. |
 Slayer Rush Slayer Rush | Space | Removes movement debuffs, +60% movespeed. Next M1: bonus damage + knockback. |
 Harvest Blood Harvest Blood | Q | Cone melee, 130 damage + 130 self-heal + knockback. Consumes Open Wound, resetting cooldown. |
 Ferocious Strike Ferocious Strike | E | Leap, 140 damage + Open Wound. Double-castable within 2s. Invulnerable during flight. |
 Enrage Enrage | R | Trance — negates next attack, charges forward striking first enemy for Open Wound + stun. |
 Headhunt Headhunt | F | Channels 5 scythes over 2.4s, 160 damage each + Open Wound. Enables multiple Q resets. |
| EX M2 | EX1 | Single high-damage projectile scaling with distance. |
| EX Q | EX2 | Incapacitates all hit enemies instead. |
Playstyle: The highest-skill-ceiling melee bloodline. The game was about maintaining the Open Wound → Harvest Blood reset loop — every ability that applied Open Wound set up another free Harvest Blood, which healed 130 and dealt 130 damage. A good Headhunter in a sustained fight was almost impossible to kill because every few seconds they were healing for 130 HP while dealing damage. The learning curve was steep, but mastered Headhunter was one of the most dominant bloodlines in the game.
The Bloodlines: Ranged Damage
Ranged bloodlines had lower health pools and dealt high damage from distance. They controlled space, poked from safety, and relied on their mobility abilities to survive when dived. In BLC’s competitive meta, ranged characters were the primary damage dealers in most compositions.
 Igniter
Identity: Fire mage. BLC’s mascot. Pure offense.
Core mechanic: Ignite DOT (from Firestorm M2 and Conflagration F) whose duration was refreshed by Fireball M1. Combo-dependent burst chains.
| Ability | Key | Description |
|---|---|---|
 Fireball Fireball | M1 | 160 damage. Refreshes Ignite duration. |
 Firestorm Firestorm | M2 | 1.4s cast, 3 projectiles (180 damage each) + knockback + Ignite. |
 Searing Displacement Searing Displacement | Space | Teleport (immaterial), 120 AoE at destination. |
 Volcano Volcano | Q | Ground AoE (1s delay), 240 damage + 0.6s stun. |
 Crippling Fire Crippling Fire | E | 160 damage projectile + knockback + 20% slow. |
 Living Flame Living Flame | R | Instant invulnerability/immateriality (up to 1.6s). AoE knockback on end. Cancellable. |
 Conflagration Conflagration | F | Rocket dash, 320 damage + Ignite to all enemies in path. |
| EX M2 | EX1 | Flaming beam DOT + Ignite to multiple targets. |
| EX E | EX2 | Bouncing projectile shackling up to 2 targets (spellcast lock + slow). |
Playstyle: Igniter was pure glass cannon. The damage output was the highest in the game, but survivability depended entirely on Searing Displacement (one teleport) and Living Flame (short invulnerability). The core rotation — Searing Displacement in → Living Flame → Crippling Fire → Volcano → Firestorm — could delete a target in seconds. But if your escape was on cooldown, one stun meant death.
Battlerite equivalent: Ashka continues the Igniter legacy as the franchise mascot.
 Gunner
Identity: Long-range precision marksman. Single-target annihilator.
Core mechanic: Focus stacks (from M1, +10% attack speed per stack, max 3). Execute (M2) was the highest-damage non-ultimate ability in BLC — 385 damage with a stun — but had a long, audible cast time.
| Ability | Key | Description |
|---|---|---|
 Focus Shot Focus Shot | M1 | 150 damage + Focus buff (+10% attack speed, stacks 3x). Longest range M1 in BLC. |
 Execute Execute | M2 | 385 damage + Stun. Pierces with -35% damage per target. Long cast time with audible cue. |
 Rocket Jump Rocket Jump | Space | Leaps in opposite direction of cursor. 120 AoE + Stun at origin. Long cooldown. |
 Stealth Stealth | Q | Invisibility + 15% movespeed (2.4s). |
 Disabling Shot Disabling Shot | E | 80 damage + Spell Block + 30% Slow. Fast projectile. |
 Mortar Mortar | R | 160 damage + Blind + knockback. |
 Rocket Launcher Rocket Launcher | F | Channels 5 rockets over 2.4s, 200 direct / 140 AoE each + knockback. |
| EX M2 | EX1 | Lower damage, faster cast, Stun + Slow. |
| EX R | EX2 | Stronger knockback explosion on impact. |
Playstyle: Gunner was the purest sniper in BLC. The entire game plan revolved around one ability: Execute. 385 damage (roughly 150% of most ranged bloodlines’ total HP) in a single hit. The cast time was long and the audio cue was loud — enemies knew it was coming. The mind-game was whether to fakecast Execute (start channeling, cancel to bait a trance) or let it fly. Stealth → Execute from fog of war was the dream combo. Rocket Jump leaping backwards was unique and skill-testing — you aimed it in the opposite direction you wanted to go.
Battlerite equivalent: Jade inherited the sniper/stealth identity.
 Engineer
Identity: Gadget-based inventor. Versatile toolkit.
Core mechanic: Oil/Burning Oil combo — Jet Pack (Space) applied Oil debuff, Flame Thrower (Q) converted Oil into Burning Oil (60 damage every 2s for 6s). Shrink Device (R) was a unique ally buff.
| Ability | Key | Description |
|---|---|---|
 Boomstick Boomstick | M1 | Shotgun, 4 pellets in arc, 46 damage each. Most effective at close range. |
 Concussion Shot Concussion Shot | M2 | 100 damage + 2.7s incapacitate (breaks on damage). Long cast time. |
 Jet Pack Jet Pack | Space | Launches to cursor, applies Oil (-25% movespeed) to enemies passed over. |
 Flame Thrower Flame Thrower | Q | 4 cone attacks, 60 damage each + 20% slow. Converts Oil to Burning Oil. |
 EMP Blast EMP Blast | E | 200 damage + 1.5s slow. Removes all positive effects from nearby enemies. |
 Shrink Device Shrink Device | R | Purges debuffs from ally, +20% attack speed, -30% size (4s). Damages/knockbacks enemies. |
 Machine Gun Machine Gun | F | Channels 18 bullets over 3s, 80 damage each + 15% slow. |
| EX Q | EX1 | Gravity beam pulling enemies + reducing attack/movespeed. |
| EX R | EX2 | Enlarges target instead — reduced damage taken + increased damage output. |
Playstyle: The Swiss army knife of ranged bloodlines. Engineer had an answer for every situation — Oil/Burn for sustained damage, Concussion Shot for CC, EMP Blast for buff removal, Shrink Device for ally support. The Shrink Device was one of BLC’s most unique abilities — making an ally smaller, harder to hit, and faster. Engineer rewarded creative play and adaptation more than any other ranged bloodline.
 Nomad
Nomad
Identity: Boomerang-wielding wind warrior. Ranged zoner.
Core mechanic: Boomerang mechanics — M1 returned after reaching max range, hitting enemies on both the outbound and return trip. Precise positioning at max range maximized damage.
| Ability | Key | Description |
|---|---|---|
 Razor Boomerang Razor Boomerang | M1 | Projectile that returns. Pierces (-55% damage per target). Return trip at 40% damage. Double-hit at max range. |
 X-Strike X-Strike | M2 | Two boomerangs in arcing paths. CC on outbound, damage on return. |
 Haste Haste | Space | Removes debuffs, +60% movespeed, -40% damage taken. Can cast ranged attacks while moving. |
 Wind Strike Wind Strike | Q | 160 damage + Slow + knockback. Anti-melee. |
 Tornado Call Tornado Call | E | Lifts target from combat for 2.8s (invulnerable). |
 Wind Bomb Wind Bomb | R | Delayed AoE, 100 damage + Sluggish (-25% movespeed, -40% projectile speed). |
 Boomerang Fury Boomerang Fury | F | Channeled barrage with progressive damage + attack/movespeed reduction. |
| EX M2 | EX1 | AoE storm that slows and damages. |
| EX Space | EX2 | Dash to location with damage + knockback. |
Playstyle: Nomad controlled zones through sheer projectile density. Boomerangs coming and going, X-Strike crossing paths, Wind Bombs exploding — the screen was a minefield for enemies. Haste was exceptional — a massive movespeed buff that let you attack while moving, turning Nomad into a mobile turret. Tornado Call removing an enemy from combat for 2.8 seconds was devastating when used on the right target (lift the healer, burst the DPS).
 Seeker
Identity: Elemental archer with illusions. Multi-element versatility.
Core mechanic: Seeker’s Grace stacks (from M1, max 3). At 3 stacks, the next elemental arrow triggered a double-cast for free.
| Ability | Key | Description |
|---|---|---|
| M1 | 150 damage + Grace stack (max 3). At 3: next elemental arrow double-casts. | |
| M2 | 180 damage + flame AoE at impact (50 DPS, 3.5s). Pierces. | |
 Blitz Blitz | Space | Dash, 100-160 damage scaling with distance + knockback. |
 Ice Arrow Ice Arrow | Q | 80 damage + Frost + delayed frost arrow rain (40 DPS + 30% Slow). |
| E | 140 damage + 140 leech + Earthslag (-15% movespeed, -25% damage/healing, stacks 2x) + knockback. | |
 Illusion Illusion | R | Trance — negates next attack, teleports to cursor, 1.3s invisibility. |
 Storm Arrow Storm Arrow | F | Piercing projectile, 140 damage + Storm (60 DPS for 3s, then 300 explosion + 200 AoE). |
| EX M2 | EX1 | Bouncing lightning arrow with Shock (movespeed reduction). |
| EX Q | EX2 | Faster trigger, stronger Frost incapacitation. |
Playstyle: The most versatile ranged bloodline. Three elemental arrows covered different situations — Fire for AoE damage, Ice for zone control, Earth for debuffing and self-healing. Grace stacks rewarded consistent aim with double-cast burst windows. Seeker’s Illusion trance was unique — instead of punishing the attacker, it teleported Seeker away and granted invisibility, making it a pure escape tool rather than a counter.
 Stormcaller
Identity: Lightning glass cannon. Multi-target chain damage.
Core mechanic: Static debuff (from M1 and Space). M1 bounced between Static-afflicted enemies with diminishing damage. Double-hitting with M2’s two projectiles inflicted Silence.
| Ability | Key | Description |
|---|---|---|
 Storm Bolt Storm Bolt | M1 | 150 damage + Static. Bounces to nearby Static targets (40/30/20/10 diminishing). |
 Charged Lightning Charged Lightning | M2 | 2 projectiles, 130 damage each. Both on same target = Silence. Both on different targets = 50 bonus + Silence on both. |
 Flash Flash | Space | Short dash (immaterial), 100 damage + Gradual Slow + Static. |
 Hail Storm Hail Storm | Q | Ground AoE (0.4s delay), Slow + 120 damage over 1.6s. Thunder strike on end: 160 damage + Stun. |
 Eye of the Storm Eye of the Storm | E | Knocks target back and airborne, removing from combat (30 DPS, 1.5s incapacitate). |
 Lightning Shield Lightning Shield | R | 50% damage reduction, 200 damage absorption. Can re-trigger to fire shields as bolts: 100 damage + knockback. |
 Emperor’s Wrath Emperor’s Wrath | F | Channeled lightning cone, 340 DPS + Slow. Continues through incapacitate. |
| EX Space | EX1 | Triple consecutive dashes with Static damage. |
| EX Q | EX2 | Shields self + debuff removal. Releases knockback proportional to absorbed damage. |
Playstyle: Stormcaller was the team-fight specialist. Tag multiple enemies with Static via M1 and Space, then watch Storm Bolt chain between them for massive multi-target damage. Charged Lightning’s double-hit Silence was devastating against healers. The trade-off was extreme fragility — Stormcaller had the least survivability of any ranged bloodline. Flash was a short-range escape, and Lightning Shield was temporary. Positioning was everything.
 Astronomer
Identity: Close-range scientific healer. Sun/Moon stance hybrid.
Core mechanic: Solar Energy stacks — built by M1 (4 stacks triggered Sun Shadow debuff reducing enemy healing/damage/movespeed by 33%). Unique as a healer classified under ranged in some community resources.
| Ability | Key | Description |
|---|---|---|
 Spectro Strike Spectro Strike | M1 | 12/13/14 damage. Builds Solar Energy. At 4 stacks: +10 bonus + Sun Shadow debuff. |
 Sunlight Sunlight | M2 | Heals nearest ally. Bounces to nearby allies for smaller heal. |
 Sun Ellipse Sun Ellipse | Space | Splits into two orbs to target location. Knocks enemies away. Burst healing + gap close. |
 Moon Stone Moon Stone | Q | AoE (0.8s delay), stuns nearby enemies. |
 Moon Burst Moon Burst | E | 20 damage + Moon Shadow (-33% casting speed). |
 Solar Charge Solar Charge | R | Trance — negates next attack, applies 4 Solar Energy stacks + Blinds, clears debuffs. |
 Astral Beam Astral Beam | F | Channeled beam — 34 DPS to enemies, 34 HPS to allies. |
| Aurora | EX1 | Enhanced heal + 25% attack/cast speed buff. |
| Sun Swirl | EX2 | Extended-range jump reducing Sun Ellipse CD by 75%. |
Playstyle: Astronomer was the most aggressive healer, functioning as a close-range hybrid. The mandatory gameplay loop was: M1 enemies to build Solar Energy → heal allies with M2 → punish with Sun Shadow debuff at 4 stacks. Astronomer had to be in the thick of combat, not backline hiding, which made positioning and Solar Charge (trance) timing critical.
Battlerite equivalent: Sirius is described as “pretty much a reskinned Astronomer” — the closest 1:1 port from BLC to Battlerite.

The Bloodlines: Healers
Healers kept allies alive through healing and crowd control. They had the lowest health pools and generally limited mobility. Their M2 was always their primary heal. Success depended on balancing offense (M1 for energy generation) with keeping allies alive. In BLC, healers weren’t passive — they aimed every heal as a skillshot and dealt meaningful damage.
 Psychopomp
Identity: Spirit healer. Debuff support.
Core mechanic: Soul stacks — built by M1 hits and successful heals (max 3). Each stack reduced damage taken by 20% and increased M1 damage by 10. Stacks dropped when struck — creating a risk/reward dynamic where offensive M1 play was rewarded with survivability.
| Ability | Key | Description |
|---|---|---|
 Soul Bolt Soul Bolt | M1 | 140 damage + Soul stack (-20% damage taken/stack, +10 M1 damage/stack, max 3). Stacks drop on hit. |
 Essence Renewal Essence Renewal | M2 | Heals nearest ally for 160 HP (diminishing with distance). Grants Soul stack. |
 Mind Transfer Mind Transfer | Space | Swaps locations with target. On enemy: 160 damage + Slow. On ally: heals both 150. |
 Terrifying Scream Terrifying Scream | Q | Instant AoE Spell Block + Slow. Interrupts casts or locks next ability for 3s. |
 Spiritual Link Spiritual Link | E | Bouncing projectile (max 3 bounces), 150/100/50 damage. Tagged enemies share 20% damage. |
 The Other Side The Other Side | R | Ally becomes invulnerable/immaterial/invisible (2s). +20% movespeed. Heals nearby allies 120 on expiry. Removes all debuffs. |
 Guardian Spirit Guardian Spirit | F | Creates spirit duplicate for Soul Bolt, Essence Renewal, and Spiritual Link (15% reduced). -33% debuff duration. |
| EX Space | EX1 | Immateriality dash, immobilizes then knocks enemies away. |
| EX Q | EX2 | Fear instead of Spell Block (better vs melee). |
Playstyle: Psychopomp rewarded aggressive M1 play — landing Soul Bolts built stacks that made you tankier and hit harder. But taking damage dropped those stacks, creating a constant dance between aggression and safety. Mind Transfer (Space) swapping positions with an ally was one of the most creative escape tools in BLC. The Other Side providing full invulnerability to an ally for 2 seconds could completely negate an enemy’s burst window.
Battlerite equivalent: Poloma.
 Herald of Insight
Identity: Space-time manipulator. Reflective support.
Core mechanic: Feeble Minded stacks (from M1, max 3) — increased enemy cooldowns by 7% per stack and increased Stifling Dust damage by 20 per stack. Chronoflux (R) reflected projectiles.
| Ability | Key | Description |
|---|---|---|
 Stifling Dust Stifling Dust | M1 | 120 damage + Feeble Minded (7% CD increase + 20 bonus damage per stack, stacks 3x). |
 Time Shift Time Shift | M2 | Heals closest ally for 140 HP + Spirit Dust (bouncing heal, 40 per bounce). |
| Time Shift | Space | Teleport + 240 AoE heal to allies + 100 damage + 33% Slow to enemies. |
 Mantra of Devotion Mantra of Devotion | Q | Instant 140 AoE heal. After 0.7s: Weaken + knockback. 40/80/120 damage scaling with Feeble Minded. |
 Cerebral Blast Cerebral Blast | E | 200 damage + Fear (forced running, 1.8s). |
 Chronoflux Chronoflux | R | Protective sphere reflecting projectiles + 33% Slow on nearby enemies (2.8s). |
 Time Rift Time Rift | EX1 | Warps Herald 3s back in time, restoring position and up to 200 HP. |
| Chrono Bolt | EX2 | 240 damage + 0.6s Stun + knockback. |
Playstyle: Herald was the most relaxed healer — positioning-dependent but not mechanically frantic. Chronoflux covering a corridor was devastating against ranged-heavy compositions, reflecting all projectiles. Cerebral Blast Fear was the primary offensive tool and should be used relentlessly against the enemy healer. Time Rift (EX1) warping Herald backwards in time to restore health was thematically perfect and mechanically powerful — a second escape that also healed.
Battlerite equivalent: Oldur. Pearl shares some design elements.
 Blood Priest
Identity: Dark magic healer. Resource management specialist.
Core mechanic: Radiant Darkness stacks (from M1, max 3). Each stack reduced the self-damage of Dark Prayer (M2 heal) by 2 and increased M1 damage. Without stacks, healing cost HP. This created a mandatory M1 → M2 rhythm.
| Ability | Key | Description |
|---|---|---|
 Orb of Darkness Orb of Darkness | M1 | 14 damage + Radiant Darkness (reduces M2 self-damage by 2/stack, +1 M1 damage/stack, max 3). |
 Dark Prayer Dark Prayer | M2 | Heals closest ally for 22 HP + Hunger for Blood (5% lifesteal, stacks 3x). Self-damage capped at 1 HP. |
 Possession Possession | Space | Teleport to target, possesses enemy (0.6s disable), 8 damage + 8 self-heal. Cannot be reflected or tranced. |
 Terror of Ahl’Buhl Terror of Ahl’Buhl | Q | 12 AoE damage (1s delay) + Fear (2s). |
 Insects Insects | E | Projectile — Insects debuff (6 DPS, -10% movespeed, -75% sight range, 2.7s) + knockback. |
 Blood Shield Blood Shield | R | Shield on ally. 33% of damage redirected to attacker. Redirected damage heals Blood Priest. |
 Corpse Explosion Corpse Explosion | F | Line of corpses: Slow on impact, 40 damage + 25 AoE heal after 0.7s delay. |
| EX Q | EX1 | Black Art — travels to target location with same Fear effect. |
| EX E | EX2 | Swarm — creates insect AoE zone (3s). |
Playstyle: The most mechanically demanding healer in BLC. The M1 → M2 cadence was non-negotiable — without Radiant Darkness stacks, healing literally damaged Blood Priest. This meant Blood Priest couldn’t just backline heal; they had to stay in M1 range of enemies to maintain stacks. Blood Shield punishing attackers by redirecting damage back to them (and healing Blood Priest) was conceptually brilliant and rewarded good read on enemy aggression targets. Insects reducing sight range by 75% was one of the most disorienting debuffs in the game.
 Alchemist
Identity: Potion-based healer. The most defensive bloodline in BLC.
Core mechanic: Disease stacks (from M1, max 3) increased subsequent Toxic Vial damage. Healing Potion (M2) was the strongest raw heal in the game but had the slowest cast time.
| Ability | Key | Description |
|---|---|---|
 Toxic Vial Toxic Vial | M1 | Projectile, 100 damage + Disease (10 DPS + 50 AoE per 2s, stacks 3x, +20 M1 damage per stack). |
 Healing Potion Healing Potion | M2 | AoE heal, 200 HP to closest ally + Revitalize (20 HP per 1.5s for 6s). Strongest M2 heal, slowest cast. |
 Barrier Barrier | Space | Shield absorbing 460 damage. +15% movespeed on self-cast. Alchemist’s ONLY escape. 5s duration. |
 Clarity Potion Clarity Potion | Q | Ground AoE: cleanses ally debuffs, strips enemy buffs, knockback. |
 Sleep Vial Sleep Vial | E | Projectile — 2.5s Sleep (breaks on damage) + 1.2s Lesser Sleep on nearby enemies. |
 Deadly Injection Deadly Injection | R | Progressive slow to 20% movespeed. On expiry: 140 damage + Weaken to target + nearby enemies. |
 Crippling Goo Crippling Goo | F | Large ground AoE lasting 6s, 70 DPS + 40% slow. Cannot be dispelled. |
| EX Q | EX1 | Applies Blind instead of cleansing. |
| EX R | EX2 | Instant damage, extended range. |
Playstyle: Alchemist was the hardest healer to kill — 460-damage Barrier shield was enormous — but also the least mobile. No teleport, no dash, no movement ability beyond the shield’s movespeed buff. A cornered Alchemist was a dead Alchemist. The gameplay was artillery-style: stay at maximum range, heal with the biggest M2 in the game, control space with Sleep Vial and Clarity Potion, and pray nobody gets behind you. Clarity Potion stripping enemy buffs while cleansing ally debuffs in one AoE was incredibly powerful in coordinated play.
 Dryad
Dryad
Identity: Nature support. Shield and mind control specialist.
Core mechanic: Confidence buff (from M1, stacks 2x, movespeed) and Soothed buff (from M2, stacks 3x, reduces debuff duration). The mind control on Suggestive Tune (E) was unique in BLC.
| Ability | Key | Description |
|---|---|---|
 Song of Despair Song of Despair | M1 | Projectile, 120 damage + Confidence buff (stacks 2x, movespeed). |
 Soothing Melody Soothing Melody | M2 | 150 HP heal + Soothed (-5% debuff duration per stack, max 3). |
 Nature’s Aegis Nature’s Aegis | Space | Directional shield absorbing 320 damage (3.5s). Rotates toward cursor. |
 Nature’s Wonder Nature’s Wonder | Q | Ground AoE + Slow. M1 into AoE: 220 damage + Amplify + Slow. M2 into AoE: heals allies 50. 4s duration. |
 Suggestive Tune Suggestive Tune | E | Projectile — allows player control of enemy movement (max 2.5s or 200 damage). |
 Nature’s Companion Nature’s Companion | R | Slow orb, 220 DPS to enemies / 220 HPS to allies. Explodes after 2.2s immobilizing enemies. |
 Wild’s Vengeance Wild’s Vengeance | F | Charges to location, 260 damage + airborne + incapacitate. |
| EX Space | EX1 | Reflects projectiles + knockback, self-cast only. |
| EX R | EX2 | Purges buffs from enemies + debuffs from allies (AoE cleanse). |
Playstyle: Dryad was the shield healer — Nature’s Aegis rotating toward the cursor was a unique defensive tool that required constant aim adjustment. Suggestive Tune was the most distinctive ability: mind-controlling an enemy’s movement let you walk them into your team, into the fog, or away from their healer. Nature’s Wonder was the combo enabler — place the AoE, then M1 or M2 into it for bonus effects. Dryad demanded more setup than other healers but rewarded coordination.
 Grimrog
Identity: Hulking shaman duo (Grim + Grog). The aggressive melee healer.
Core mechanic: Curse system — landing Wicked Blessing (M2) on an enemy unlocked curse abilities. Healing Ward (Q) was a destructible stationary healer. Grimrog had to weave between healing allies and cursing enemies.
| Ability | Key | Description |
|---|---|---|
 Claw Attack Claw Attack | M1 | 100/110/120 damage. |
 Wicked Blessing Wicked Blessing | M2 | Heals allies + Blessing of Kojo (-4% cooldowns per stack, max 3). Required to activate curses. |
 Grimgrol’s Gate Grimgrol’s Gate | Space | Creates two portals (3s or 1 use). Repositions self or allies. |
 Healing Ward Healing Ward | Q | Stationary ward — 4 HP per 0.5s + 20% damage reduction to nearby allies. Blocks projectiles. Destructible. |
 Curse of Silence Curse of Silence | E | 170 damage + 2s Silence. |
 Claw Flurry Claw Flurry | R | Spins to target, 120 damage + Curse of Kojo (-25% movespeed). +20% movespeed + 60% attack speed for 4s. |
 Curse of Weakness Curse of Weakness | F | Charged projectile, large AoE — reduced healing + damage output. |
| Dark Voodoo | EX1 | Transforms incoming healing into damage on target (caps at 170). |
| Rampage | EX2 | Dash dealing 80-180 damage with 6 incapacitating strikes. |
Playstyle: The scariest healer in BLC. Grimrog got in your face — Claw Attack into Claw Flurry into Curse of Silence was a melee combo that most healers couldn’t match. The portal (Space) was one of the most creative mobility tools, allowing repositioning across obstacles. Healing Ward provided sustained area healing while Grimrog was busy cursing enemies. The key combo — Fear → Silence → Claw Flurry — dealt roughly 230 damage with devastating follow-up potential. Grimrog had the steepest learning curve among healers because balancing melee aggression with healing duties was genuinely hard.

Competitive Scene
Key Concept: Bloodline Champions was the first true arena brawler esport. Before MOBAs dominated competitive gaming, BLC proved that pure skillshot PVP — no items, no levels, no lane phase — could sustain a tournament scene. The players it produced went on to compete at the highest levels of Hearthstone, League of Legends, and Overwatch.
BLC’s competitive community was small but intense. The game generated $41,905 in total prize money across 12 tournaments from June 2011 to June 2016. Nearly all of it (97.5%) was from offline LAN events, centered around DreamHack in Jönköping, Sweden.
Major Tournaments
DreamHack Summer 2011 — $10,000 prize pool
| Place | Team | Players | Prize |
|---|---|---|---|
| 1st | Orz | Hafu (US), Iverson (US), MegaZero (US) | $6,000 |
| 2nd | Public Transportation | Dandido (SE), HybriD (SE), ViktorY (SE) | $3,000 |
| 3rd | SK Gaming | Chipshajen (SE), Jackazzm (NO), r3x (SE) | $1,000 |
DreamHack Winter 2011 — $10,000 prize pool
| Place | Team | Players | Prize |
|---|---|---|---|
| 1st | x6tence.ESET | Chipshajen (SE), Mithy (ES), Verosk (UK) | $6,000 |
| 2nd | 4Kings | kippacat (SE), Pandrum (SE), Zab (UK) | $3,000 |
| 3rd | GameSense Black | Gazhag (FI), Presto (UK), ViktorY (SE) | $1,000 |
DreamHack Summer 2012 — $10,000 prize pool
| Place | Team | Players | Prize |
|---|---|---|---|
| 1st | MrDandiktory | Dandido (SE), Mr2 (DK), ViktorY (SE) | $6,000 |
| 2nd | Razer.Meanwhile in Finland | Entarion (CH), Gazhag (FI), Jouho (FI) | $3,000 |
| 3rd | Hotell | Altaar (NO), Muhle (NO), Soho1 (NO) | $1,000 |
StarLadder StarSeries Season 1 (April 2012) was the largest single BLC tournament at $10,850.
Top All-Time Earners
| Player | Country | Total Earnings |
|---|---|---|
| ViktorY (Viktor Corneliusson) | Sweden | $4,500 |
| Dandido (Martin Lundberg) | Sweden | $4,167 |
| Mr2 | Denmark | $3,167 |
| Chipshajen (Sebastian Widlund) | Sweden | $2,433 |
| Mithy (Alfonso Aguirre Rodriguez) | Spain | $2,100 |
Players Who Went On
The BLC competitive scene produced players who became stars in other games:
Hafu (Rumay Wang) — Won DreamHack Summer 2011 with Orz. Became one of the most successful Hearthstone Arena players and a top Twitch streamer. Also competed in World of Warcraft PVP.
Mithy (Alfonso Aguirre Rodriguez) — Won DreamHack Winter 2011. Became a legendary League of Legends pro support player, competing for Lemondogs, Origen, G2 Esports, and TSM. One of the most accomplished European LoL players of all time.
Chipshajen (Sebastian Widlund) — Won DreamHack Winter 2011. Became a top-tier Overwatch support player for Team EnVyUs and Dallas Fuel in the Overwatch League.
ViktorY (Viktor Corneliusson) — Highest BLC earner, appeared in all 3 major DreamHack events. A fixture of the competitive BLC community from start to finish.
Dandido (Martin Lundberg) — Second-highest earner, won DreamHack Summer 2012.
Organizations
Notable esports organizations that fielded BLC teams: SK Gaming, Team Dignitas, x6tence, 4Kings, Orz, ZowieGear, Razer, LowLandLions, in7 eSports, Team Ninjapull.
BLC to Battlerite: The Legacy
When Stunlock Studios created Battlerite, many BLC bloodlines were reimagined:
| BLC Bloodline | Battlerite Champion | Notes |
|---|---|---|
| Astronomer | Sirius | Closest 1:1 port — near-identical kit |
| Igniter | Ashka | Series mascot successor |
| Ranid Assassin | Croak | Direct descendant — same frog, same stealth |
| Psychopomp | Poloma | Strong resemblance in support mechanics |
| Herald of Insight | Oldur / Pearl | Time/space manipulation theme |
| Stalker | Croak (partial) | Stealth assassin DNA |
| Glutton | Rook | Earth tank brawler identity |
| Gunner | Jade | Sniper/stealth ranged design |
Most Battlerite champions were “inspired by” rather than copied. Kits were reworked for Battlerite’s different systems — Battlerites replacing Traits/Medallions, different energy economy, streamlined ability counts. But the DNA was always visible. If you knew BLC, picking up Battlerite felt like coming home.

BLC Legacy: Twenty-seven bloodlines. Nine abilities each. Every single one a skillshot. No auto-attacks, no lock-on targeting, no stat checks. Bloodline Champions stripped PVP down to its purest form and proved that when every ability requires aim, every fight becomes a conversation between players — a rapid exchange of reads, reactions, and predictions that no other game had attempted at this scale. The servers are gone, but the design philosophy lives on in every arena brawler that followed.
Why This Matters
Bloodline Champions shut down in December 2017. The community sites have gone dark. The detailed ability data, the competitive history, the mechanical nuances — all of it has been scattering across archived forum posts and fading memories.
This guide exists because BLC deserves to be remembered in detail, not just as “that game before Battlerite.” The 27 bloodlines, each with 9 abilities, represented one of the most mechanically rich PVP experiences ever created. The recovery health system, the trance mind-games, the center orb pressure, the energy dilemma — these weren’t just features. They were the design philosophy that proved skillshot-only team PVP could work.
The arena brawler genre exists because Stunlock proved it with BLC. Every game in the space — Battlerite, Alea, Nebulagon, and whatever comes next — is building on the foundation that 27 bloodlines laid in a Swedish studio in 2011.
If you’re looking for the broader story of BLC’s rise and fall, read Bloodline Champions: The Game That Started Arena PVP. If you want to understand the competitive concepts that BLC perfected, start with our cooldown trading guide. And if you’re looking for the games carrying BLC’s torch forward, see Indie PVP Games You Should Know About.
This guide was compiled from multiple sources including the Baako’s Rave guides (the most comprehensive BLC resource), the Bloodline Champions Fandom Wiki, TV Tropes character pages, Steam community guides, Esports Earnings tournament data, and surviving community archives. Damage values represent a specific patch era and may have varied across BLC’s lifespan. If you have corrections or additional information, reach out — preserving this history accurately matters.


Discussion